


P f f t . ™ Tutorials.
Page 1 of 1 • Share

P f f t . ™ Tutorials.
![]() by Guest Tue Aug 10, 2010 5:41 am
by Guest Tue Aug 10, 2010 5:41 am
Info ;
My names Leanne, (:
I'll be here to teach so to make some s h e i t .
These are the b a s i c s .
If your stuck on something message me on hotmail ;
prbly.imvu@hotmail.com
andd i can guide you through the steps ;P
If you would like me to make a tut for something then fill out the form.
My files sales.
Rules ;
x. Do not resell.
x. Do not take credit for my work.
x. These are 1oo% made by me.
x. Do not edit then resell.
x. More coming soon.
Tutorials ;
Lips
Eye Base
Hair
Nails
Stomach
Breasts
Blush
Body Highlights
Smokey Eyes
Tutorials Coming ;
-
Request ;
Hello, my names ______ .
and i'd like to request a tutorial.
Leanne, would you be able to make a ________ tut?
Thaanks, :]
Guest
- Guest
Re: P f f t . ™ Tutorials.
![]() by Guest Tue Aug 10, 2010 5:41 am
by Guest Tue Aug 10, 2010 5:41 am
Lip Tutorial
1. Open you head template.
2. Make sure you have your lip shape ready.
3. Open up a new layer. Ctrl + Shift + N.
then zoom in as far as you want it, (:
4. Naoo, wht i want you to do is grab the 3px brush.
Draw a squiggly line down the middle of your lip base,
{ Using the colour black #000000 }

Its not suppose to be perfect.
5. Naoo wht you need to do is gaussian blur it.
Filter --> Blur --> Gaussian Blur
Settings on ; 3.8 Pixels.
Then click okay. Duhh ;p
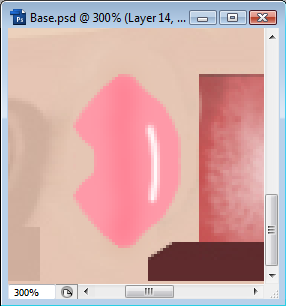
You should end up with something like this ;

6. Set the layer to overlay.
Then lower the opacity to 79%.

7. Open a new layer. Ctrl + Shift + N.
Naoo, we're going to add some shine to your lips.
Grab the 3 Px brush again.
Draw a curved line on the bottom lip.
It should go with the shape of you lip base.
8. We're going to smudge it a little.
Put the settings on ;
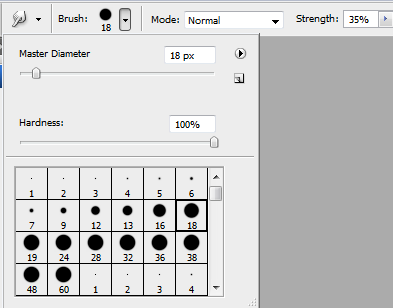
9. Give it a little smudge.
Make sure you try andd follow the shape of the lips again.

10. Now we're going to do exactly the same with the top.
but its going to be a little different.
Make sure you open a new layer!
You only need to draw on one side of the lip base.

11. Smudge it into the shape tht you want it to be in.

Dont smudge it to much.
12. Filter --> Blur --> Gaussian Blur
Settings on ; 2.8 Pixels.
Ctrl + J
Edit --> Transform --> Flip Vertically.
Now hold shift while dragging it into the right place.
13. Time to blend it in a little.
Grab your smudge tool again and start blending (:
14. Open up a new layer. Ctrl + Shift + N.
Go down to the bottom lip again, using the 1 px brush
Draw a little line in the spot shown.
{ Or wherever you want it }

15. Naoo, wht you can do it give it the tiniest smudge.
Just so it blends in a little.
16. Do exactly the same for the top lip.
Make sure you rmbr to do it to one side.
Then just flip it C:
Oya, dont forget to Duplicate it first. Ctrl + J

hen wa lahhh, Your done ;DD
This is wht mine turned out to look like.
Simple yuhh? (;
I hope you liked it.
andd please show us wht you make, ^o^
Leave a review or some comments if you wish. hehe, xo~
1. Open you head template.
2. Make sure you have your lip shape ready.
3. Open up a new layer. Ctrl + Shift + N.
then zoom in as far as you want it, (:
4. Naoo, wht i want you to do is grab the 3px brush.
Draw a squiggly line down the middle of your lip base,
{ Using the colour black #000000 }
Its not suppose to be perfect.
5. Naoo wht you need to do is gaussian blur it.
Filter --> Blur --> Gaussian Blur
Settings on ; 3.8 Pixels.
Then click okay. Duhh ;p
You should end up with something like this ;
6. Set the layer to overlay.
Then lower the opacity to 79%.
7. Open a new layer. Ctrl + Shift + N.
Naoo, we're going to add some shine to your lips.
Grab the 3 Px brush again.
Draw a curved line on the bottom lip.
It should go with the shape of you lip base.
8. We're going to smudge it a little.
Put the settings on ;
9. Give it a little smudge.
Make sure you try andd follow the shape of the lips again.
10. Now we're going to do exactly the same with the top.
but its going to be a little different.
Make sure you open a new layer!
You only need to draw on one side of the lip base.
11. Smudge it into the shape tht you want it to be in.
Dont smudge it to much.
12. Filter --> Blur --> Gaussian Blur
Settings on ; 2.8 Pixels.
Ctrl + J
Edit --> Transform --> Flip Vertically.
Now hold shift while dragging it into the right place.
13. Time to blend it in a little.
Grab your smudge tool again and start blending (:
14. Open up a new layer. Ctrl + Shift + N.
Go down to the bottom lip again, using the 1 px brush
Draw a little line in the spot shown.
{ Or wherever you want it }
15. Naoo, wht you can do it give it the tiniest smudge.
Just so it blends in a little.
16. Do exactly the same for the top lip.
Make sure you rmbr to do it to one side.
Then just flip it C:
Oya, dont forget to Duplicate it first. Ctrl + J
hen wa lahhh, Your done ;DD
This is wht mine turned out to look like.
Simple yuhh? (;
I hope you liked it.
andd please show us wht you make, ^o^
Leave a review or some comments if you wish. hehe, xo~
Guest- Guest
Re: P f f t . ™ Tutorials.
![]() by Guest Tue Aug 10, 2010 5:41 am
by Guest Tue Aug 10, 2010 5:41 am
Eye Base
1. Open up a 256 x 256 layer.
2. Colour the whole thing to white.
3. Naoo grab the Ellipical Marquee Tool.
4. Open up a new layer. Ctrl + Shift + N
5. While holding shift draw a circle in the middle of your eye.
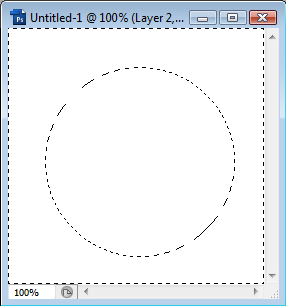
6. If its not in the middle put your pointer to the middle and move it into the middle (:
7. Naoo click Ctrl + Shift + I.
It should change the selection to the other side.
8. Fill the selection in using the paint bucket tool.
{ Using the colour black #000000 }
9. Naoo deselect it.
andd give it a gaussian blur.
Settings On.

Then click okay.
Your done, ;D ;D ;D
W o o h o o !
1. Open up a 256 x 256 layer.
2. Colour the whole thing to white.
3. Naoo grab the Ellipical Marquee Tool.
4. Open up a new layer. Ctrl + Shift + N
5. While holding shift draw a circle in the middle of your eye.
6. If its not in the middle put your pointer to the middle and move it into the middle (:
7. Naoo click Ctrl + Shift + I.
It should change the selection to the other side.
8. Fill the selection in using the paint bucket tool.
{ Using the colour black #000000 }
9. Naoo deselect it.
andd give it a gaussian blur.
Settings On.
Then click okay.
Your done, ;D ;D ;D
W o o h o o !
Guest- Guest
Re: P f f t . ™ Tutorials.
![]() by Guest Tue Aug 10, 2010 5:41 am
by Guest Tue Aug 10, 2010 5:41 am
Hair
1. Open up a new layer 256 x 256 .
Fill it in with the colour tht you want.
{ Im using #875325 }
2. Pick a colour thts a few shades lighter.
Naoo using a 18px fuzzy brush.
Draw a couple of lines.
3. Do the same with lighter or darker shades.
4. Add noise.

5. Motion blur.

6. Open up a new layer.
Using a 21px fuzzy brush.
Draw a weird random squiggly line through the middle of your hair texture.
7. Motion blur.

8. Then set it to overlay or screen.
D o n e . D o n e .
1. Open up a new layer 256 x 256 .
Fill it in with the colour tht you want.
{ Im using #875325 }
2. Pick a colour thts a few shades lighter.
Naoo using a 18px fuzzy brush.
Draw a couple of lines.
3. Do the same with lighter or darker shades.
4. Add noise.
5. Motion blur.
6. Open up a new layer.
Using a 21px fuzzy brush.
Draw a weird random squiggly line through the middle of your hair texture.
7. Motion blur.
8. Then set it to overlay or screen.
D o n e . D o n e .
Guest- Guest
Re: P f f t . ™ Tutorials.
![]() by Guest Tue Aug 10, 2010 5:42 am
by Guest Tue Aug 10, 2010 5:42 am
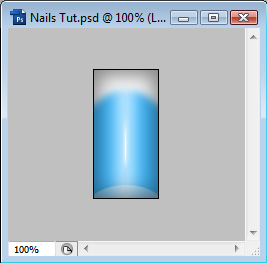
Nails
1. Open up a new file, 64 x 128.
Colour it in with the colour tht you want.
{ I chose the colour #43baff }
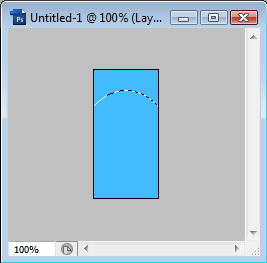
2. Open a new layer
Grabbing the Ellipical Marquee Tool.
Make a shape like this.
3. Naoo click Ctrl + Shift + I.
Colour it in with white, then deselect it.
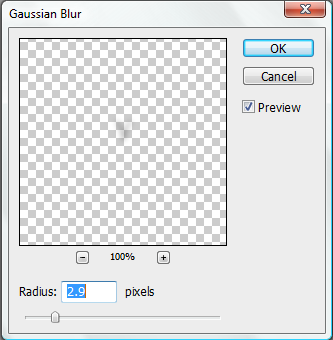
4. Give it a gaussian blur.
Settings on ;

5. Open a new layer.
Under it.
So click on the layer before it then.

Ctrl + Shift + N
6. Using a 12px Paint brush.
Draw a staright line down the middle.
{ Hold shift while dragging it down. }
7. Naoo give it a gaussian blur.
Settings on ;

Then Click okay ;P
7. Open up a new layer.
Ctrl + Shift + N.
Using the 3px brush draw a small line down the middle.
Like so.

8. Naoo give it a little smudge on the ends.

9. Naoo we're gunna give it a little a gaussian blur.
Settings on ;

1o. Open up a new layer.
Ctrl + Shift + N.
Grab the 2px brush and draw a smaller line then before, in the same place.
Then smudge the ends again.
11. Naoo click on the top layer.

Open up a new layer.
Ctrl + Shift + N.
Using a 6px brush. Draw a border.
Time to blur it again.

12. Time to lower the opacity to 69% ;P
bahaha, 69, (:
Childish i know but pre cool number, ^-^
Okay nup, i change my mind, ahaha.
Lower it down to 48% n_n
If you dont like it 48% just play with the opacity until you like it (:

13. Go down to the layer before tht.
Using the Ellipical Marquee Tool.
Make a cuticle shape thingy.
Colour it in with white.
{ #ffffff }
Then lower the opacity down to 41%
You can add more shine and stuff if you wanted,
with the way tht i showed you.
Its rly up to you.
L a l a l a ~ Your done !
1. Open up a new file, 64 x 128.
Colour it in with the colour tht you want.
{ I chose the colour #43baff }
2. Open a new layer
Grabbing the Ellipical Marquee Tool.
Make a shape like this.
3. Naoo click Ctrl + Shift + I.
Colour it in with white, then deselect it.
4. Give it a gaussian blur.
Settings on ;
5. Open a new layer.
Under it.
So click on the layer before it then.
Ctrl + Shift + N
6. Using a 12px Paint brush.
Draw a staright line down the middle.
{ Hold shift while dragging it down. }
7. Naoo give it a gaussian blur.
Settings on ;
Then Click okay ;P
7. Open up a new layer.
Ctrl + Shift + N.
Using the 3px brush draw a small line down the middle.
Like so.
8. Naoo give it a little smudge on the ends.
9. Naoo we're gunna give it a little a gaussian blur.
Settings on ;
1o. Open up a new layer.
Ctrl + Shift + N.
Grab the 2px brush and draw a smaller line then before, in the same place.
Then smudge the ends again.
11. Naoo click on the top layer.
Open up a new layer.
Ctrl + Shift + N.
Using a 6px brush. Draw a border.
Time to blur it again.
12. Time to lower the opacity to 69% ;P
bahaha, 69, (:
Childish i know but pre cool number, ^-^
Okay nup, i change my mind, ahaha.
Lower it down to 48% n_n
If you dont like it 48% just play with the opacity until you like it (:
13. Go down to the layer before tht.
Using the Ellipical Marquee Tool.
Make a cuticle shape thingy.
Colour it in with white.
{ #ffffff }
Then lower the opacity down to 41%
You can add more shine and stuff if you wanted,
with the way tht i showed you.
Its rly up to you.
L a l a l a ~ Your done !
Guest- Guest
Re: P f f t . ™ Tutorials.
![]() by Guest Tue Aug 10, 2010 5:42 am
by Guest Tue Aug 10, 2010 5:42 am
Stomach
1. Open up your skin template.
2. Ctrl + Shift + N.
3. Grab a 5px brush.
And make a "U" shape on the stomach.
Make sure you're using the colour ; #ffffff
Like so ;

4. Go to
--> Filter --> Blur --> Gaussian Blur
On the settings ;

5. Now open a new layer.
Ctrl + Shift + N
Grabbing the skin colour that you want.
I used ; #e0af86
Then set the layer to "colour" and lower the opacity down to 69%

Should look something like this ;

My result~

This was a basic skin tutorial.
1. Open up your skin template.
2. Ctrl + Shift + N.
3. Grab a 5px brush.
And make a "U" shape on the stomach.
Make sure you're using the colour ; #ffffff
Like so ;
4. Go to
--> Filter --> Blur --> Gaussian Blur
On the settings ;
5. Now open a new layer.
Ctrl + Shift + N
Grabbing the skin colour that you want.
I used ; #e0af86
Then set the layer to "colour" and lower the opacity down to 69%
Should look something like this ;
My result~
This was a basic skin tutorial.
Guest- Guest
Re: P f f t . ™ Tutorials.
![]() by Guest Tue Aug 10, 2010 5:42 am
by Guest Tue Aug 10, 2010 5:42 am
Breasts
1. Open up your skin template.
Ctrl + Shift + N.
The grabbing a 2px brush.
Make a shape like this ;

2. Now we need to duplicate it.
Ctrl + J
Then go to
Edit --> Transform --> Flip horizontal
By holding shift, drag it across.
& move it into a "V" shape.

Then click Ctrl + E
3. Filter --> Blur --> Gaussian blur.
4. Lower the opacity.

5. Using a 1px brush now,
Draw another like, like this ;

Then smudge the ends a little.

6. Now we need to duplicate it.
Ctrl + J
Then go to
Edit --> Transform --> Flip horizontal
By holding shift, drag it across.
& move it into a "V" shape again.
Then lower the opacity to ;

If you dont like the way it looks, give it a little blur,
and play with the opacity a little.
1. Open up your skin template.
Ctrl + Shift + N.
The grabbing a 2px brush.
Make a shape like this ;
2. Now we need to duplicate it.
Ctrl + J
Then go to
Edit --> Transform --> Flip horizontal
By holding shift, drag it across.
& move it into a "V" shape.
Then click Ctrl + E
3. Filter --> Blur --> Gaussian blur.
4. Lower the opacity.
5. Using a 1px brush now,
Draw another like, like this ;
Then smudge the ends a little.
6. Now we need to duplicate it.
Ctrl + J
Then go to
Edit --> Transform --> Flip horizontal
By holding shift, drag it across.
& move it into a "V" shape again.
Then lower the opacity to ;
If you dont like the way it looks, give it a little blur,
and play with the opacity a little.
Guest- Guest
Re: P f f t . ™ Tutorials.
![]() by Guest Tue Aug 10, 2010 5:42 am
by Guest Tue Aug 10, 2010 5:42 am
Blush
1. Open up your head template.
Select the colour of the blush that you want.
Im using ; #f9c9c
Open up a new layer.
Then grab the 7px brush, and make a line like this ;

2. Ctrl + J
Edit --> Transform --> Flip horizontal
By holding shift, drag it across.
Ctrl + E
Should look like this now ;

3. Filter --> Blur --> Gaussian blur.
With the settings on ;

Now, you're done, :]
If you want it lighter,
just play with the opacity a little, (:
My result ;

1. Open up your head template.
Select the colour of the blush that you want.
Im using ; #f9c9c
Open up a new layer.
Then grab the 7px brush, and make a line like this ;
2. Ctrl + J
Edit --> Transform --> Flip horizontal
By holding shift, drag it across.
Ctrl + E
Should look like this now ;
3. Filter --> Blur --> Gaussian blur.
With the settings on ;
Now, you're done, :]
If you want it lighter,
just play with the opacity a little, (:
My result ;
Guest- Guest
Re: P f f t . ™ Tutorials.
![]() by Guest Tue Aug 10, 2010 5:43 am
by Guest Tue Aug 10, 2010 5:43 am
Highlights
1. Open up your body template.
Now grab the 6px brush.
And draw some lines on these areas of the skin ;

Draw is on one side only.
Then go to.
Ctrl + J
--> Edit --> Transform --> Flip horizontal
By holding the shift, drag it across into the same place but on the other side.
Ctrl + E
2. Now give it a Gaussian blur.
--> Filter --> Blur -->Gaussian blur
With the settings on ;

3. Ctrl + Shift + N
Grabbing you skin colour,
Using the paint bucket tool,
Cover the whole layer with that colour.
The colour i used is #
Now set the layer to colour.
And put the settings on ;

Then you're done, :]
But make sure you play with the layers a little.
My result ; -
Yeah theres no stomach, but just use my stomach tut, ;D
1. Open up your body template.
Now grab the 6px brush.
And draw some lines on these areas of the skin ;
Draw is on one side only.
Then go to.
Ctrl + J
--> Edit --> Transform --> Flip horizontal
By holding the shift, drag it across into the same place but on the other side.
Ctrl + E
2. Now give it a Gaussian blur.
--> Filter --> Blur -->Gaussian blur
With the settings on ;
3. Ctrl + Shift + N
Grabbing you skin colour,
Using the paint bucket tool,
Cover the whole layer with that colour.
The colour i used is #
Now set the layer to colour.
And put the settings on ;
Then you're done, :]
But make sure you play with the layers a little.
My result ; -
Yeah theres no stomach, but just use my stomach tut, ;D
Guest- Guest
Re: P f f t . ™ Tutorials.
![]() by Guest Tue Aug 10, 2010 5:43 am
by Guest Tue Aug 10, 2010 5:43 am
Smokey Eyes
1. Open up your head template.
Pick the colour black. [#000000]
The using a 5px brush,
draw something like ;
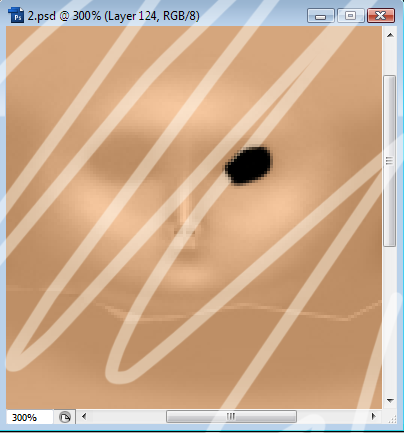
On the eyelid.
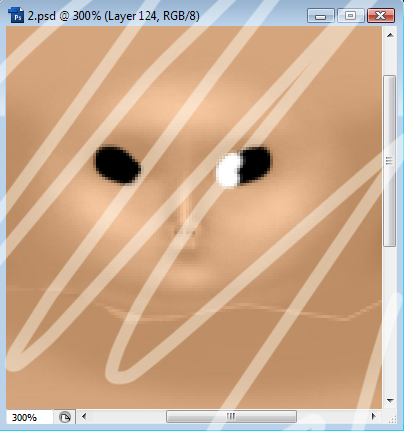
2. Ctrl + J
Edit --> Transform --> Flip horizontal
By holding shift, drag it across.
Ctrl + E
3. Open a new layer.
Pick the colour white. [#ffffff]
and draw something like this ;
[Using the same px brush]
4. Filter --> Blur --> Gaussian blur
With the settings on ;

Dun dun dun ~
(:
Simple yuh?
My result ;

1. Open up your head template.
Pick the colour black. [#000000]
The using a 5px brush,
draw something like ;
On the eyelid.
2. Ctrl + J
Edit --> Transform --> Flip horizontal
By holding shift, drag it across.
Ctrl + E
3. Open a new layer.
Pick the colour white. [#ffffff]
and draw something like this ;
[Using the same px brush]
4. Filter --> Blur --> Gaussian blur
With the settings on ;
Dun dun dun ~
(:
Simple yuh?
My result ;
Guest- Guest


Re: P f f t . ™ Tutorials.
![]() by Guest Sat Aug 14, 2010 1:28 pm
by Guest Sat Aug 14, 2010 1:28 pm
oooh lovely :] i loves the nail one :d shall be using it
Guest- Guest

Re: P f f t . ™ Tutorials.
![]() by Guest Fri Sep 17, 2010 10:01 pm
by Guest Fri Sep 17, 2010 10:01 pm
Nice and thanks
________________________________________
Make cash from affiliate programs like health and beauty affiliate programs.
________________________________________
Make cash from affiliate programs like health and beauty affiliate programs.
Guest- Guest

Re: P f f t . ™ Tutorials.
![]() by PocketTheif Sun Nov 11, 2012 5:25 pm
by PocketTheif Sun Nov 11, 2012 5:25 pm

PocketTheif
» Tutorials and Help!
» • n o x i o u s • ;; Lollirot Video Tutorials
» English ~ Dutch Tutorials
» Cookieleo Skin Enchansing Tutorials
» Tumor Free tutorials. new tuts up
» • n o x i o u s • ;; Lollirot Video Tutorials
» English ~ Dutch Tutorials
» Cookieleo Skin Enchansing Tutorials
» Tumor Free tutorials. new tuts up
Page 1 of 1
Permissions in this forum:
You cannot reply to topics in this forum|
|
|